Top:

Tasty Bite!
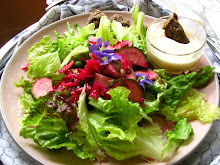
An edible fall flower, Hollyhock, with stamen removed and filled with: Saffron Risotto, Butternut Squash, topped with Sprouted Black Lentils and Micro Leeks

Thursday, January 28, 2010

Live Tacos!

(also see Live Taco Salad Below)
Taco Shells
You will need a food processor and a dehydrator with teflex sheets. Or you can make a nearly live version by placing parchment-paper lined cookie sheets in a low-heat oven (170 degrees with the door propped open).

Adding whole sprouted flax seeds and chopped cilantro gives the shells texture and character. However, you can skip that if you are in “get-er-done” mode. (The recipe works without these garnishes.)

All or part of these steps can be made in advance. You will want to allow 1/2-day for the "shells." Humidity is unpredictable. Have a back-up plan or make them a day ahead.

Ingredients:
  • 1 cup zucchini meat, diced
  • ½ cup sprouted golden flax (wet)
  • plus 2 TBS (wet), divided (optional)
  • ½ a small onion, diced
  • 1 small clove garlic, minced or pressed
  • 1 tablespoon cold-pressed olive oil or sunflower oil
  • 1 tsp of Grade B maple syrup
  • 1/2 teaspoon ground cumin (I use fresh whole cumin seed and grind it fresh with ¼ tsp Sicilian course-grind natural sea salt in a clean coffee grinder or spice mill)
  • Pinch of chili powder, cayenne or taco seasoning (optional)
  • 1/4 teaspoon raw apple cider vinegar or a squirt fresh lemon juice (about 1/4 teaspoon) (optional)
  • ¼ cup fresh chopped cilantro (optional)
Instructions:
Reserve 2 TBS or golden flax and ¼ cup of fresh chopped cilantro. Process all other ingredients until smooth, add ing clean-source water, 1 TBS at a time, to form a batter that can be poured but is not too watery.* Stir in whole sprouted flax seeds and cilantro. Use a ladle to form taco-shell sized puddles on teflex sheets. Dehydrate at 115 degrees until you can flip them over (2 to 4 hours), Then, lower the heat to 105 until pliable, but not dry. Store in single layers or stacked with parchment paper dividers until ready to use. You can re-warm at 105 degrees in 10 minutes just prior to use.

*If you screw it up, and it's too watery, don't panic! Add 1 or 2 TBs of dry ground flax seed and wait 15 minutes or until wateriness subsides.

The Taco “Meat”
You will need a food processor. This part is SUPER EASY! You can make this and serve on "Taco Salad" or in lettuce wraps when you don't want to bother with the zucchinni shells.

Ingredients:
  • 1/2 cup raw activated walnuts, washed
  • ½ cup sprouted pumpkin seeds, washed
  • 5 or 6 soaked unsulferated apricots (or substitute 5 or 6 thick slices of dehydrated plantain meat plus 1 tsp of Grade B maple syrup) Reserve soaking liquids for another recipe to sweeten a smoothy or nut mylk
  • 1/2 a small jalapeño pepper, diced
  • ½ a small onion, diced
  • 1 or 2 cloves garlic, minced or pressed
  • 1 tablespoon cold-pressed olive oil or walnut oil
  • 1/2 teaspoon ground cumin (I use fresh whole cumin seed and grind it fresh with ¼ teaspoon of Himalayan pink salt, fine ground
  • ½ to 1 tsp chili powder or taco seasoning
  • ¼ tsp smoky paprika (optional)
  • 1/4 teaspoon raw apple cider vinegar or a squirt fresh lemon juice (about 1/4 teaspoon) (optional)
  • 1 tsp carob powder (optional)
  • 1 TBS of organic Catsup or 1 medium sun-dried tomato soaked in oil (optional
Instructions:
Process ingredients to a course grind in the food processor – think, "crumbly meat” texture. Refrigerate for use later or spread out on the dehydrator tray and warm it at 115 degrees for 10 to 20 minutes while you prepare “Not-cho-chez” and toppings of choice like: shredded lettuce; sliced avocados, sprouts; chopped onion, peppers and cilantro; home-made salsa; and cashew sour cream.

Leaving the mixture in the dehydrator for an hour or two will produce "loose meat" crumbles that can be refrigerated and used on taco salads. I try to make enough to eat for dinner and have left over for wraps or salads the next day. It can be re-warmed in the dehydrator with each use, if you prefer. However, it's yummy cold too!

Not-Cho-Chez Sauce
You will need a food processor or a high-speed blender.
Golden, gooey and wondefuly "cheesy". If you use a red bell pepper you won't need the tumeric powder. It turns and unmistakable cheese-wiz gold! (I learned this from sweet Gretchen of the low lands, my Costa-Rica livin' gal pal. Missin' you!)

Ingredients:
  • ½ cup sprouted sunflower seeds, washed
  • ½ a small red or golden bell pepper
  • ¼ cup raw sunflower oil (Cold-pressed oil can be substituted)
  • 1 Tsp Namu Soyu
  • ¼ cup nutritional yeast (optional)
  • 1 to 2 tsps turmeric powder (optional)
  • A pinch of chili powder (optional)
Instructions:
Use a high-speed blender.
Blend ingredients until smooth. Refrigerate until ready to use.

Cashew or Sunflower Seed Sour “cream”
You will need a food processor or a high-speed blender

Ingredients:
  • ½ cup soaked cashews or sprouted sunflower seeds, washed
  • ½ a small white onion
  • 1 TBS of fresh squeezed lemon juice
  • ½ tsp raw clear agavi
  • Pinch of sea salt
  • Clean source water added 1 TBS at a time.
Instructions:
Use a high-speed blender. Blend ingredients until smooth. Refrigerate until ready to use.

Put it all together and you have: Live Taco Night! I swear, my family gobbles these up! No complaints. No, "What-ever-happened to the good old days of meat and cheese?" They love this recipe!

Live Taco Salad Bowl or Wrap!
with fun and versatile
Spiral Zucchini Noodles!

If you want a quick and easy meal? Use the Taco "Meat" recipe above to make a hearty salad or wrap. Skip the zucchini shells. Spiralize them fresh instead. (This is optional to the toco salad or wrap, of course. But it adds a nice texture and "toothiness" missing from winter and spring lettuce.) Stuff about 1/3 of a cup of the "noodles" into a lettuce leaf and fill the rest of the space with taco "meat," cooked or sprouted beans (optional) and dressing, salsa and toppings of choice.
A Spiralize is a fun kitchen gadget that costs $30 or less, is easy and fun to use. Kids dig it. So, you wont have any problem involving them in Spiralized salads. You can spiralize any firm veggie: carrots, turnips, beats, radishes, sweet potatoes, betternut squash, pumpkins...

I make extra "noodles" and serve as a side dish with orange ginger vinaigrette. The oil inthe dressing helps stop oxidation of the thinnly sliced veggies. (If you spiralized a whole bunch of zucchini noodles you can make angle-hair "spaghetti" by coating with extra vergin olive oil and adding your favorite raw tomatoe sauce. Or, creat a chopped vggie and Spiralized "Pasta Salad" by marinated zucchini "noodles" with chooped vegitables and Itallian seasons. Toss in some garbonzo beans for variety. Yum!)


(also see Live Taco Salad Below)

Taco Shells
You will need a food processor and a dehydrator with teflex sheets. Or you can make a nearly live version by placing parchment-paper lined cookie sheets in a low-heat oven (170 degrees with the door propped open).

Adding whole sprouted flax seeds and chopped cilantro gives the shells texture and character. However, you can skip that if you are in “get-er-done” mode. (The recipe works without these garnishes.)

All or part of these steps can be made in advance. You will want to allow 1/2-day for the "shells." Humidity is unpredictable. Have a back-up plan or make them a day ahead.

Ingredients:
  • 1 cup zucchini meat, diced
  • ½ cup sprouted golden flax (wet)
  • plus 2 TBS (wet), divided (optional)
  • ½ a small onion, diced
  • 1 small clove garlic, minced or pressed
  • 1 tablespoon cold-pressed olive oil or sunflower oil
  • 1 tsp of Grade B maple syrup
  • 1/2 teaspoon ground cumin (I use fresh whole cumin seed and grind it fresh with ¼ tsp Sicilian course-grind natural sea salt in a clean coffee grinder or spice mill)
  • Pinch of chili powder, cayenne or taco seasoning (optional)
  • 1/4 teaspoon raw apple cider vinegar or a squirt fresh lemon juice (about 1/4 teaspoon) (optional)
  • ¼ cup fresh chopped cilantro (optional)

Instructions:
Reserve 2 TBS or golden flax and ¼ cup of fresh chopped cilantro. Process all other ingredients until smooth, add ing clean-source water, 1 TBS at a time, to form a batter that can be poured but is not too watery.* Stir in whole sprouted flax seeds and cilantro. Use a ladle to form taco-shell sized puddles on teflex sheets. Dehydrate at 115 degrees until you can flip them over (2 to 4 hours), Then, lower the heat to 105 until pliable, but not dry. Store in single layers or stacked with parchment paper dividers until ready to use. You can re-warm at 105 degrees in 10 minutes just prior to use.

*If you screw it up, and it's too watery, don't panic! Add 1 or 2 TBs of dry ground flax seed and wait 15 minutes or until wateriness subsides.

The Taco “Meat”
You will need a food processor. This part is SUPER EASY! You can make this and serve on "Taco Salad" or in lettuce wraps when you don't want to bother with the zucchinni shells.

Ingredients:
  • 1/2 cup raw activated walnuts, washed
  • ½ cup sprouted pumpkin seeds, washed
  • 5 or 6 soaked unsulferated apricots (or substitute 5 or 6 thick slices of dehydrated plantain meat plus 1 tsp of Grade B maple syrup) Reserve soaking liquids for another recipe to sweeten a smoothy or nut mylk
  • 1/2 a small jalapeño pepper, diced
  • ½ a small onion, diced
  • 1 or 2 cloves garlic, minced or pressed
  • 1 tablespoon cold-pressed olive oil or walnut oil
  • 1/2 teaspoon ground cumin (I use fresh whole cumin seed and grind it fresh with ¼ teaspoon of Himalayan pink salt, fine ground
  • ½ to 1 tsp chili powder or taco seasoning
  • ¼ tsp smoky paprika (optional)
  • 1/4 teaspoon raw apple cider vinegar or a squirt fresh lemon juice (about 1/4 teaspoon) (optional)
  • 1 tsp carob powder (optional)
  • 1 TBS of organic Katsup (optional)

Instructions:
Process ingredients to a course grind in the food processor – think, "crumbly meat” texture. Refrigerate for use later or spread out on the dehydrator tray and warm it at 115 degrees for 10 to 20 minutes while you prepare “Not-cho-chez” and toppings of choice like: shredded lettuce; sliced avocados, sprouts; chopped onion, peppers and cilantro; home-made salsa; and cashew sour cream.

Leaving the mixture in the dehydrator for an hour or two will produce "loose meat" crumbles that can be refrigerated and used on taco salads. I try to make enough to eat for dinner and have left over for wraps or salads the next day.


Not-Cho-Chez
You will need a food processor or a high-speed blender.

Golden, gooey and wondefuly "cheesy". If you use a red bell pepper you won't need the tumeric powder. It turns and unmistakable cheese-wiz gold! (I learned this from sweet Gretchen of the low lands, my Costa-Rica livin' gal pal. Missin' you!)

Ingredients:
  • ½ cup sprouted sunflower seeds, washed
  • ½ a small red or golden bell pepper
  • ¼ cup raw sunflower oil (Cold-pressed oil can be substituted)
  • 1 Tsp Namu Soyu
  • ¼ cup nutritional yeast (optional)
  • 1 to 2 tsps turmeric powder (optional)
  • A pinch of chili powder (optional)
Instructions:
Use a high-speed blender. Blend ingredients until smooth. Refrigerate until ready to use.

Cashew or Sunflower Seed Sour “cream”
You will need a food processor or a high-speed blender

Ingredients:
  • ½ cup soaked cashews or sprouted sunflower seeds, washed
  • ½ a small white onion
  • 1 TBS of fresh squeezed lemon juice
  • ½ tsp raw clear agavi
  • Pinch of sea salt
  • Clean source water added 1 TBS at a time.

Instructions:
Use a high-speed blender. Blend ingredients until smooth. Refrigerate until ready to use.

Put it all together and you have: Live Taco Night! I swear, my family gobbles these up! No complaints. No, "What-ever-happened to the good old days of meat and cheese?" They love this recipe!


Live Taco Salad! (with fun and versatile Spiral Zucchini Noodles)
If you want a quick and easy meal? Use the Taco "Meat" recipe above to make a hearty salad or wrap. Skip the zucchini shells. Spiralize them fresh instead. (This is optional to the toco salad or wrap, of course. But it adds a nice texture and "toothiness" missing from winter and spring lettuce.) Stuff about 1/3 of a cup of the "noodles" into a lettuce leaf and fill the rest of the space with taco "meat," cooked or sprouted beans (optional) and dressing, salsa and toppings of choice.

A Spiralize is a fun kitchen gadget that costs $30 or less, is easy and fun to use. Kids dig it. So, you wont have any problem involving them in Spiralized salads. You can spiralize any firm veggie: carrots, turnips, beats, radishes, sweet potatoes, betternut squash, pumpkins...

I make extra "noodles" and serve as a side dish with orange ginger vinaigrette. The oil inthe dressing helps stop oxidation of the thinnly sliced veggies. (If you spiralized a whole bunch of zucchini noodles you can make angle-hair "spaghetti" by coating with extra vergin olive oil and adding your favorite raw tomatoe sauce. Or, creat a chopped vggie and Spiralized "Pasta Salad" by marinated zucchini "noodles" with chooped vegetables and Itallian seasons. Toss in some garbonzo beans for variety. Yum!)


Tuesday, January 26, 2010

Raw "Cheeze Cake" : better than the real thing!


Inspired by Cynthia's Winter Solstice Chocolate Moose, this delicacy has many variations but one thing in common: Avocados. Yup. I didn't believe it until i tried it. It's smooth, silky, chocolate yumminess without a clue to the main ingredient. Not that I don't love avocados, BOY, do I?! However, this is worth sacrificing the guacamoli or purchasing extra. They are in abundance this time of year. You can add-on Organic Avo's to your Fresh-Connect home delivery for $1.50 each. worth it! They are twice that in the store.


Turn's out, it's fairly common in raw food circles to whip up a batch of coaco-enhanced avo-meat. Check the dessert section of any reputable raw foodie un-cookbook. you will find at least one raw chocolate or carob dessert made with the secret ingredient: alligator pear!

Avocados are a healthy fat, complete protien and packed with: vitamins E and K, dietary fiber, folic acid, vitamin B6, vitamin C, trace minerals, oleic acid, (a monounsaturated fat that may help lower cholesterol.), potassium (a mineral that helps regulate blood pressure)

All ingredients are organic.

Start with a Nut-Crust of Choice. My two favorites are Peanut/Pumpkin Seed and Hazelnut Date

Peanut/Pumpkin Seed Nut-Crust

You will need: 1 glass dish or pie plate, flat-bladed food-processor (Cuisinart), refrigeration.

Ingredients:

  • 1 cup of dry or soaked pumpkin seeds
  • 1 cup roasted peanut stock (from New Mexico)*
  • 3 or 4 soaked majool dates (soaking water reserved)
  • Soaking water from the dates, as needed
  • ¼ cup grade B maple syrup
  • ½ tsp of living sea salt
  • ½ cup coconut butter
  • ¼ cup coconut oil plus a bit more the oil the glass dish
  • ¼ cup wild-crafted mesquite pod meal (optional)
  • seeds of a whole cured vanilla bean or 1 tsp vanilla caviar (optional)
  • ½ tsp of pure almond extract (optional)

Process in flat-bladed food processor to desired consistency. Add small amounts of the soaking water from the dates and scrape down the sides of the processor bowl frequently. You can pulse it into a course and crunchy crust, or a consistently smooth dough. I like course and crunchy and it’s easier to work with. Use wet hands to press crust into a glass dish. Pop it in the freezer while you make the filling.

Option #2: Hazelnut-Date Crust

Same as above. Substitute 2 cups of soaked or dry hazelnuts for the peanuts and pumpkin seeds. Or use half pumpkin seeds, half hazelnuts or any fraction you’d like. It’s a very forgiving recipe as long as you keep it fairly sticky, but not too dry. Avoid too much liquid. If it does become to wet, add lucuma powder or tocol trinols to desired consistency. It will firm up when chilled.

Chocolate Filling

  • 2 or 3 pitted medjool dates, soaked (soaking water reserved)
  • seeds of two whole cured vanilla beans or vanilla caviar, in a pinch, natural vanilla extract
  • Fruit meat from 3 or 4 ripe mashed avocados
  • 1/4 cup grade B maple syrup
  • 2 to 3 TBs of raw honey
  • 1/4 cup of coconut butter (optional, but, will have a lighter texture without it)
  • 2 TBs of coconut oil
  • 1/4 cup of raw carob powder
  • 2 to 3 TBS of raw cacao powder (For color. Carob alone makes a murky greyish green color pie.)
  • soaking water from the dates

Place the dates, maple syrup, coconut butter and vanilla in a food processor and process until smooth. Add the avocado, 2 TBs coconut oil, raw honey, carob and cacao powders. Blend until creamy, stopping occasionally to scrape down the sides. Add the date-soak-water as needed. Take out 2 to 4 small protions to eat as “mousse” at room temp. Fill crust with the rest. Chill until sliceable. Will keep for three days in the refrigerator or two weeks in the freezer.

Variations: Omit the water and use as mouse as a frosting for uncookies. Double the water to use as chocolate sauce. Freeze for 4 hours then thaw 15 minutes to use as frozen custard.

Top with fancy stuff that you like!

Other Cool Stuff to Do with Avocados Disguised as Chocolate Mousse:

Mesquite Almond Spoon Truffles

Add mesquite pod meal and sprouted almonds in amounts to your liking to the Chocolate Filling recipe above, eat by the spoonful! Be creative, you can ad whatever you want! Who's going to argue with that!? Here, have a whole spoonful of goodness for goodness sake!


Fancy Freezer Truffles
Use a melon-baller dipped in oil to form little round globes of Chocolate Filling. Decorate with fancy stuff like: sprouted almond "leaves", black walnut bits, candied flower pedals and berries of all types. Serve chilled. Don't worry if you forget to pass out the napkins. There will be finger-licking, even among the most polite.

Thursday, January 21, 2010

Kraut for Stellar Pro-Biotics


I learned to make raw Sauerkraut at a workshop taught by Jane and Loran Van Benthusen in Kansas City. I could not believe how simple recipe turned out to be because I feel in love with it on the first bite! I thought there must be some sort of trick. No trick. We make it all the time now and it comes out fantastic every time! I recommend their work-shops, recipes and classes! Check them out at: www.janevanbenthusen.com

Raw kraut is pro-biotic living food supplement that you make at home. If you have shopped for digestive enzymes you know, it can be really expensive to take a daily dose. This recipe will give you over a month's supply for the price of 2 heads of cabbage and 1/4 cup of high-quality salt. What are we at for a total there, around $2.50? It's also delicious! Even people you do not like sauerkraut (even people who do not like cabbage), seem to love this crunchy fresh raw kraut.

Kraut is a fermented food. What's the big deal? Fermented foods are critically important for transitioning to a cleansing diet that will boost your energy and allow your body to recover from years of eating meats, dairy and processed food. As i mentioned, you can also choose to supplement with high-quality digestive enzymes and pro-biotic powders. However, these are expensive, usually cultured from GMO dairy products and limited in the diversity of their pro-biotic structures. The most highly complex (and therefore the most beneficial) probiotics come from fermented foods. Home-made is always best!

Step-by-Step Kraut
Put on some rockin' music!
(Takes about 1/2 hour, or less for one jar, for two people. We prefer to put up several heads of cabbage at once. 'Cause it's messy. No biggy. Make the mess, quick clean-up, good-to-go again!)
Ingredients:
  • High-quality Living Sea Salt
  • Cabbage
That's it. If you like tradition German Sauerkraut flavor, add a few caraway seeds. If you want to mix it up and have different flavors, add celery seeds to some, fennel to others. Poppy seeds, cumin, hot pepper flakes and orange peel all work well too. You can also include other shredded veggies. Beets are gorgeous, turn the whole thing pink and add sweetness. Carrots, garlic, shallots, chives, tarragon leaves, mustard seeds and greens, kale and chard all work well too. I just love the plain.

Instructions:
Step one: Make a work-space on a solid surface. Plan for to make a mess. Wear an apron and don't bother to mop until later, put stuff away that you don't want to have to clean off later. It will get on the floor, it will stick to your shirt and you will splash it on anything you have setting out. Get out: a large mixing bowel, clean jar (or jars) with lid(s), something to pound it down with (I use the wand from the Vitamix or a couple of wooden pestles from an old Chensway Strainer. Some people have a large ladle soup ladle or a mallet wrapped in plastic that they like to use.

Step two: Figure out an efficient way to shred or chop the cabbage. I like my Saladmaster Cutter. Then, the floppy outer leaves over go into the Cusinart with the straight cut blade. Of course a chefs knife and a cutting board will do just as well.


Step 3: Get your groove on! Put about 3 to 4 inches of loose chopped cabbage in the jar, sprinkle with 1/2 tsp salt and pound-pound-pound until water appears. When your pounder starts to splash-splash-splash, add another 3 or 4 inches of cabbage and another 1/2 tsp of salt. ad any seeds or "extras" at each layer.

Step 4: Repeat until the jar is an inch from being full or the cabbage is gone. Ad any seeds or "extras" at each layer. One persona can be cutting while the other pounds. (Here's Jamie helping me out. If you know Jamie, here's a laugh: He's wearing a shirt that was a gift from Ana, it says, "Old Guys Rule," I reverse tie-dyed it for him.)


There will be quite a bit of water at the end. Note. We didn't ADD any water. It just comes out of the cabbage.

Step 5: When you have about an inch of space left in the jar above the "water level," fold an outer leaf from the cabbage, or you can use a large beat leaf or chard or grape leaf, to push in on top and keep the cabbage from oxidizing.


Step 6: You will now seal the jar and place it at warm room temperature for a week or more. WHATEVER YOU DO, DO NOT SKIP STEP 7.

Step 7: Make a post-it that says, "Burp Me" and stick it to the mirror or some place in your house where you will look at it every day. It is IMPORTANT to unscrew or pop the lid on your jars of kraut EVERY DAY. If you do not, they may burst. That's "Burst," as in, broken glass, wet cabbage and disappointment everywhere. Here is why use leave an inch. The inch at the top of the jar gives you a little squirm-room in case you would forget one time. We make it a practice to burp twice a day as a safety precaution. Also, whenever anyone in the family burps, it reminds us to check the jars.

Step 8: Tasting for "doneness." Don't bother to taste it until a full week has passed. It tastes pretty much like wet salty cabbage and you won't like it. If is still tastes like wet salty cabbage after a week, leave it a few more days, burping all the time and taste each day. You might see carbonation forming. This is good. Carbonation means its "cooking." You might see mold on top. This is not something to worry about. But, do remove it and replace the top leaf with a fresh one. Rarely, only in the heat of summer have I had this happen.

Step 9: Refrigerate: When the kraut is at it's desired "doneness," (for me, that is still crunchy, but discolored to mostly light gold with hints of green) burp one last time and transfer to the fridge.

Step 10: Eat it. Eat a good-sized fork full every day for probiotic balance, especially before or with a meal that contains cooked foods, carbs or protein. It seems to be a miracle cure for sweet-cravings. Great for heartburn, angina, arthritis, nausea and even headaches! Great medicine. You can't over-dose on fermented cabbage. Have as much as you like. Serve as a side dish. Mix with chopped veggies for a flavorful lunch.

Tuesday, January 19, 2010

Bacon!?! Better! Eggplant Bacon!!!!


Eggplant Bacon Wraps with Saute of Cabbage, Onion, Garlic, Mushrooms;
Fresh Yellow Bell Pepper Slices;
Fresh-picked Pea Sprouts in Lettuce Leaves


Used as a condiment, eggplant bacon is a healthy alternative to commercial vegetarian bacon substitutes. This recipe was inspired by Matthew Kenny's book, Everyday Raw. He uses eggplant bacon to make a vegetarian version of a traditional Cobb Salad. We used it for EBLT wraps, salad, egg-salad, sprouted lentils and baked* potato toppings. Yum.

It might sound weird, but his is a standard raw-foodie ingredient to keep on hand for wraps, salad toppings, snacking. There are a lot of recipes out there that are SUPER high in sodium. Hey, that's what's appealing about bacon. It's salty. Eggplant bacon is no different. The saltier, it seems, the better. My Thursday Demo & Dine class and helped work out this recipe to reduce the sodium level considerably from what we saw posted on-line and in various raw food uncook-books. I also like the "smokey" taste we achieved by using smoked paprika powder from Alhabahi Mart in the City River Market, KC, MO. You can use Hungarian paprika with a pinch of chili powder as a substitute.

You can flavor this up different ways. Think: honey, onion, chipotle chili pepper, garlic, mustard, rosemary, lavender...oh, I could go on! Make it really complex, or you just do the quick version to have as a staple hand. It keeps for several weeks refrigerated and freezes well too. This version turned out really good. For a quick version, leave out anything below that says (optional). It will still be good!

Once you get a feel for this, do double batches.

Ingredients:
  • 1 large eggplant sliced length-wise (We left the peel on. It turns black, but no bother. It tastes great and the texture is snap-crispy! You can peel it if you are impressing the in-laws or fussy people. It does look better peeled. Use a Cut-Co peeler. Otherwise, you'll be frustrated! I'm not kidding.)
  • 2 TBS of sea salt
  • 1/4 cup of toasted sesame oil
  • 1/4 cup grade B maple syrup**
  • 2 TBS of namu shoyu
  • 2 TBS apple cider vinegar
  • 1 tsp of smoky paprika (or substitute Hungarian paprika)
  • Fresh ground black pepper to taste (We used gourmet peppercorn mix)
  • Juice from 1 orange (optional)
  • Zest from one orange (optional)
  • 1 tsp chili powder (optional)
  • 1 tsp of ground cumin (optional)
  • tamarind paste or concentrate (available at Middle-Eastern Stores) (optional)
  • VERY SMALL pinch of cayenne (optional)
Step 1: Lay sliced eggplant in a glass dish, toss with coarse sea salt (fine ground salt will work too. Avoid processed salts). Let rest for 1-3 hours at room temp or or longer the fridge.

Step 2: Before adding the seasonings, drain and squeeze the liquid from the resting eggplant slices. Also give them a quick cold-water rinse in a stainer. Give the glass dish a quick rinse-out while the eggplant slices are in the stainer. Return the eggplant to the clean glass dish.

Step 3: Blend other ingredients into a "dressing." Adjust the seasoning. Remember, you are going for salty, sweet, smokey. The flavors will intensify with dehydration. Don't over-do the salt or pepper. You can wreck the whole thing with too much Cayenne. When you are happy with the sweet-salty balance, pour over the eggplant slices and allow to marinate for at least 45 minutes. I like to marinate for a whole day in the fridge and turn them a couple of times. (The longer the marinating time, the more intense the flavor.)

Step 4: Dehydrate 24 to 36 hours on screens or tefex sheets at 105 degrees, until crisp. Eat warm or store refrigerated in waxed paper or plastic zip-locks with a paper towel added to the bag. Can be re-heated by placing a few strips in the dehydrator at 1005 degrees, 10 to 20 minutes prior to use, and it stays crisp even when cold.

Another variation: Use honey in place of maple syrup and apple cider or apple-beet juice in place of orange juice. This variation is good with LOTS of fresh-ground pepper. The beet juice makes it looks like bloody bacon when its marinating. Weird! Not to worry, it turns into a nice rosy appearance when dehydrated.

Favorite variation, so far: Use the Vita-mix or a blender to macerate a whole tomato with a pinch of salt, and one heaping TBS of tamarind concentrate. Add to the dressing. If a tomato is not available, organic ketchup can be substituted. (Ah ha! you say, the secrets come to light! Yes, sometimes I go for the quick fix, but not every day and not to compromise on quality. The ketchup actually tastes even more awesome than the tomato, but, it's a compromise all the same. Ketchup is processed and it s not raw.)

*Yes, that's "baked" as in "cooked at a high temperature." Remember, "high-raw" means "a high percentage of raw foods" and some cooked foods. I'm not crazy! I like my potatoes cooked!

**Also, Maple Syrup is a living food. But, it is not raw. Sap from the maple tree is boiled into a syrup. The condensed sugars are pro-biotic and hence, "living". Grade B Maple syrup has a higher nutrient content than grade A, and grade B usually costs less. A to Z Fresh-air Fair, 114 S. 8th Street, in DT Saint Joseph, carries a WONDERFUL grade B maple syrup in quart sized GLASS Bottles! PERFECT! Look for Herrman's Pure Wisconsin Maple Syrup

Frugal Raw Gourmet Tip:
Save extra marinade and use it to flavor:
Veggie patties that you make from the pulp left-over after juicing
OR
Living Seed Crackers (see basic recipe at demoanddinelive.blogspot.com)

Worth repeating, the following article is an excerpt from Living-foods.com, explaining whole food plant minerals as our best source of health and vitality. Dehydrating actually gives our system MORE access to these important minerals.


MINERALS IN DEHYDRATED FOODS
Dried food is the most exciting way to get minerals IN BALANCE. Exciting because it tastes good and it's great to share with friends.
Nothing turns a friend on more than raw fig bars, cashew-date leather, or home-dried apple or banana -- well at least turns them on to raw foods!
You get MORE minerals in dried foods because all the water's gone, which is 70% of the cells. So you get both QUANTITY and BALANCE.
Dehydrating gives you more nutrients for less digestive work, just like juicing. It's so easy to snack on a few fig bars made from living plants in your very own Dehydrator. Compare that to gorging on all those plants if they were still plumped up with water, especially the sprouted grain. It would take forever to chew on the grains, nuts, seeds and figs in a fig bar.
To me, it's not possible to get enough minerals if you don't include dehydrated foods and juices in your life. Double Noble Laureate Dr. Linus Pauling said: "One could trace every sickness, every disease and every ailment to a mineral deficiency" (quoted in "The Power of Plant Derived Minerals" by Elmer Heinrich).
Heinrich also writes: "I have witnessed thousands of people lose weight naturally, and I mean lots of weight, after they began to consume a full spectrum of 70 or more minerals on a daily basis."
When you get the right kitchen equipment -- a Dehydrator, a Sprouter and a Juicer -- and choose ORGANIC plant foods, you will enjoy every mineral you need, more than 70, in perfect harmony.
There's over three thousand known minerals, and who knows how many we need? Only plants hide that secret. Buy your veggies, fruits and Sprouter seeds from mineral-rich organic soils.
end-


Saturday, January 2, 2010

Live Vibe: juices!


Green Apple, Pumpkin, Celery, Beet Juice
Check out the STRIPES:
This Living Juice is SO BEAUTIFUL it was difficult to stop photographing it and drink it! I should have had a video cam - All the stripes "breath"!
I joined a Juice Club on-line with cafegratitude.com
I love Cafe Gratitude's energy and the co-founder, Terces Engelhart!
So, it's juice for the first week of each month of 2010! There. That's a New Year's Resolution, if I've er'heard one!

I juice the green apples, pear, celery and ginger first and then add the beets and pumpkin last. The result is the amazing striping: a peachy delicate foam top; a glowing translucent chartreuse base and a big yummy fuchsia middle.

For two juices:

Chop the ingredients into pieces that will fit in the juicer and divide into equal stacks:
3 to 4 small green apples
1 pear, divided (optional)
1 or 2 barbs of celery
1 medium beet with 2" of the stems still attached
1 small piece of ginger, divided
1 four-inch burdock root (optional)

Juice the light-colors first and the darker ones last.
Drink in layers, or stir it up. It's all good!

What's in the Freezer at Val's

Hey, wait. That's not really my freezer is it? Wow, what's that in front? Empty places to put things? No Way! Delightful. Okay, I'm easy to please. But, I have to say, having a clean, organized freezer it the best feeling. Ever since Teresa Moylan helped me organize my pantry, I've been on a roll... Thank you Teresa!Let me know if you would like Teresa and I to help you with kitchen coaching and pantry organization. We're a team. We don't charge too much and we won't tell anybody about the chocolate and Cheeze-puffs.
(Saint Joseph and Kansas City area)
816-364-6922

Okay, What's in my freezer?
  • Ice for the ice chest comes out of the ice maker. I use clean-source water in trays for chillin' the Chichory hazelnut drinks.
  • Then, there's the frozen blueberries and a big jar of sun-dried wild Canadian blueberries. I stocked up because they are seasonal.
  • The big jar in the middle is muesli (Raw rolled oats with dried fruits). I could keep it in the fridge, if there was room. (I won't bore you with the fridge)
  • Behind the muesli jar are bags of hemp, sesame and flax seeds, buckwheat grouts and some frozen coconut mylk.
  • There is a plastic zip-lock bag full of favas and behind that are some cow beans.
  • Then, there's a bunch of jars full of nutmeats, raisins, gojis, sultaines and other yummy things to add to muesli and use as ingredients for goodies.
  • There's a container of hummus and some left-over peanut-butter macaroons (glass dish).
  • I also store soft seeds like sunflower, pumpkin and fennugreek in the freezer. I have extra in the garage-fridge. but, I like having them on hand and it doesn't hurt to freeze them.
  • Bottom shelf: clean-source water ice cubes for hazel-nut chicory chillin'; a bowl with 3 persimmons* (They will turn into a delightful freezy or pudding treat after thawing a bit); more nutmeats and seeds in glass jars so I can always see how much is left.

*See Easy Persimmon Freezy Recipe in this blog